SECRETS YOU NEVER KNEW ABOUT DOUGH CONDITIONERS | Commercial VS Natural Dough Conditioner
Ever wondered how bakeries achieve consistency each time with the taste, texture, and flavor of their breads? With all the ingredients that go into a loaf of bread like butter / magarine , milk, sugar, and flour, etc yet they still achieve same result everytime. The secret is Dough Conditioner.
In my COMMERCIAL NIGERIA AGEGE BREAD RECIPE, I did a brief introduction into what a dough conditioner is, how to use, etc. In today’s article, I will discuss at length what it actually is, how to use, and mostly, I will focus on Natural Dough Conditioner that’s perfect for home bread makers or home bakers who want to always achieve consistent result each time they make breads and even DOUGHNUTS!
What are Dough Conditioners?
Dough conditioner is any baking ingredient that improves the production and consistency of a dough. I would like to state too that any additional ingredients aside from flour, yeast, and water can be considered a dough conditioner. This could be commercially made in the form of concentrates or dry mixes from a proprietary blend of natural chemicals, agents, and ingredients.
Sometimes, in search results you would come across Dough Conditioner, or Dough Enhancer, or Dough Improver or Bread improver. They are all referring to the same thing; just different terms (names).
Dough conditioners are believed to have become a part of the commercial baking scene in the 1950s in paste and liquid forms. Powered forms were created in the 1980s and are now considered essential to the baking industry to make products like bread, bagels, english muffins, sweet rolls, etc.
Is Dough Conditioner bad for you?
Dough conditioners or dough improvers or dough enhancer are not bad. The commercial or confection additive versions are termed ‘food-grade’ meaning they are safe to use or eat. But they are not what I would term healthy. As a home Baker, or small bakery owner, the natural dough conditioners are my best and surest bet. They are what I have been using in my years of baking.
So let’s talk about Commercial Dough Conditioner VS Natural Dough Conditioner.
COMMERCIAL DOUGH CONDITIONER (Confection Additives) :
There are different agents that are added to commercial dough conditioner in powders or liquid forms in order to produce the desired chemical reactions in the dough. These agents are namely:
- Reducing Agents : break down the protein network in dough and restructure the gluten. This cuts down on the mixing and proofing time required. In one of my first LIVESTREAM sections on YouTube, I spoke about gluten/protein network. Examples of these Reducing Agents are l-cysteine, sodium bisulfite, inactive yeast, fumaric acid.
- Enzymes : break down molecules in the dough and feed the yeast to make the process of fermentation and gas production happen sooner. Some common examples are amylase, protease, lipoxygenase, xylanases.
- Oxidants : Oxidants strengthen the dough through disulfide bonding (to stabilize the tertiary and/or quaternary structures of proteins and this may be intra-protein or inter-protein) to encourage gas retention. Example of oxidants are ascorbic acid, potassium bromate, azodicarbon-amide, potassium iodate.
- Emulsifiers : Emulsifiers consolidate the gluten and add to its tolerance while being handled. Because of their water- and fat-soluble regions, they are able to make a more balanced environment in the dough which leads to a more uniform dough and desirable crumb consistency. This means it makes the gluten stronger during the processes of kneading or proofing. Some common emulsifiers are diacetyltartaric acid esters of monoglycerides (DATEM), stearoyl lactylates (SSL), Monoglycerides, calcium stearoyl lactylate (CSL).
EDC :(Elden Dough Conditioner) :
EDC ( this is a replacement for Potassium Bromate) could be in liquid form like I used in my COMMERCIAL BREAD RECIPE or in powdered form. The powdered or liquid form performs the same function. The liquid form looks like vinegar but thicker.
You can get it from baking stalls or those who sell bread items (best bet!). For the powered ones, just add it to your dry items and continue with the recipe, while for the liquid ones, add to your wet item. It is safe to eat as it’s classified ‘food-grade’ but it is not what I will call healthy. You would see them in this terms EDC 2000 (powdered form), EDC 95 (liquid form), E-281, and E-202.
For commercial bakeries in Nigeria here are lists of EDC available and certified by NAFDAC: Morphan 500, EDC 95; EDC 2000 (an improvement on EDC Dough Oxidant); Bake Rite; Puratos S500 (blue bread improver); Painforce concentrated bread improver; Vahiforce; and ALL GREEN bread improver; DYNAMIL; UNIPAN super bread improver; MIJL WEG ; ALPHAMALT BXT; GM BH RERRCAMP; AMIPAN; ANGEL; PANOK SUPPER BAKE bread improver; SUPREME LONG LIFE; SUPREME MAXI and SUPREME; Betta Baker (20Kg carton); Betta Baker (10g sachet); BRAMMCO Power Integrated Dough Improver; PB of Pacific Biscuit Manufacturing Nigeria Limited; VITARISE; NPB Bakery improver; FLOMOD Flour Additive; BETTA BAKER bread premix; LGM 22T tablet bread improver; and PROSON block bread improver. [ Source : TheGuardian ]
How much Dough Conditioner should I use?
It is important to note that very little dough conditioner is required to impact a dough recipe. It is important to follow the recommended measurement ratio stated in your recipe or on the packing of the commercial dough conditioner you purchase since each blend will have their differences.
NATURAL DOUGH CONDITIONER
As an advocate of natural, homemade, and most importantly healthy treats, I would elaborate in details some Natural Dough Conditioner that has worked for me over the years. I use this not only in my breads but also in my signature DONUTS (feel free to follow my Donut page).
Dough Autolyse :
It is a natural dough conditioner technique used to boost the gluten formation in bread. It is the act of combining the flour and some or all of the water in a recipe, and then leaving the mixture to rest for some period.
It involves mixing warm water and flour before adding any other ingredients, you allow the protein to absorb all the water without having to share it with the starch and without being stressed by the carbon dioxide bubbles from the yeast pushing against the gluten net before it’s had a chance to firm up.
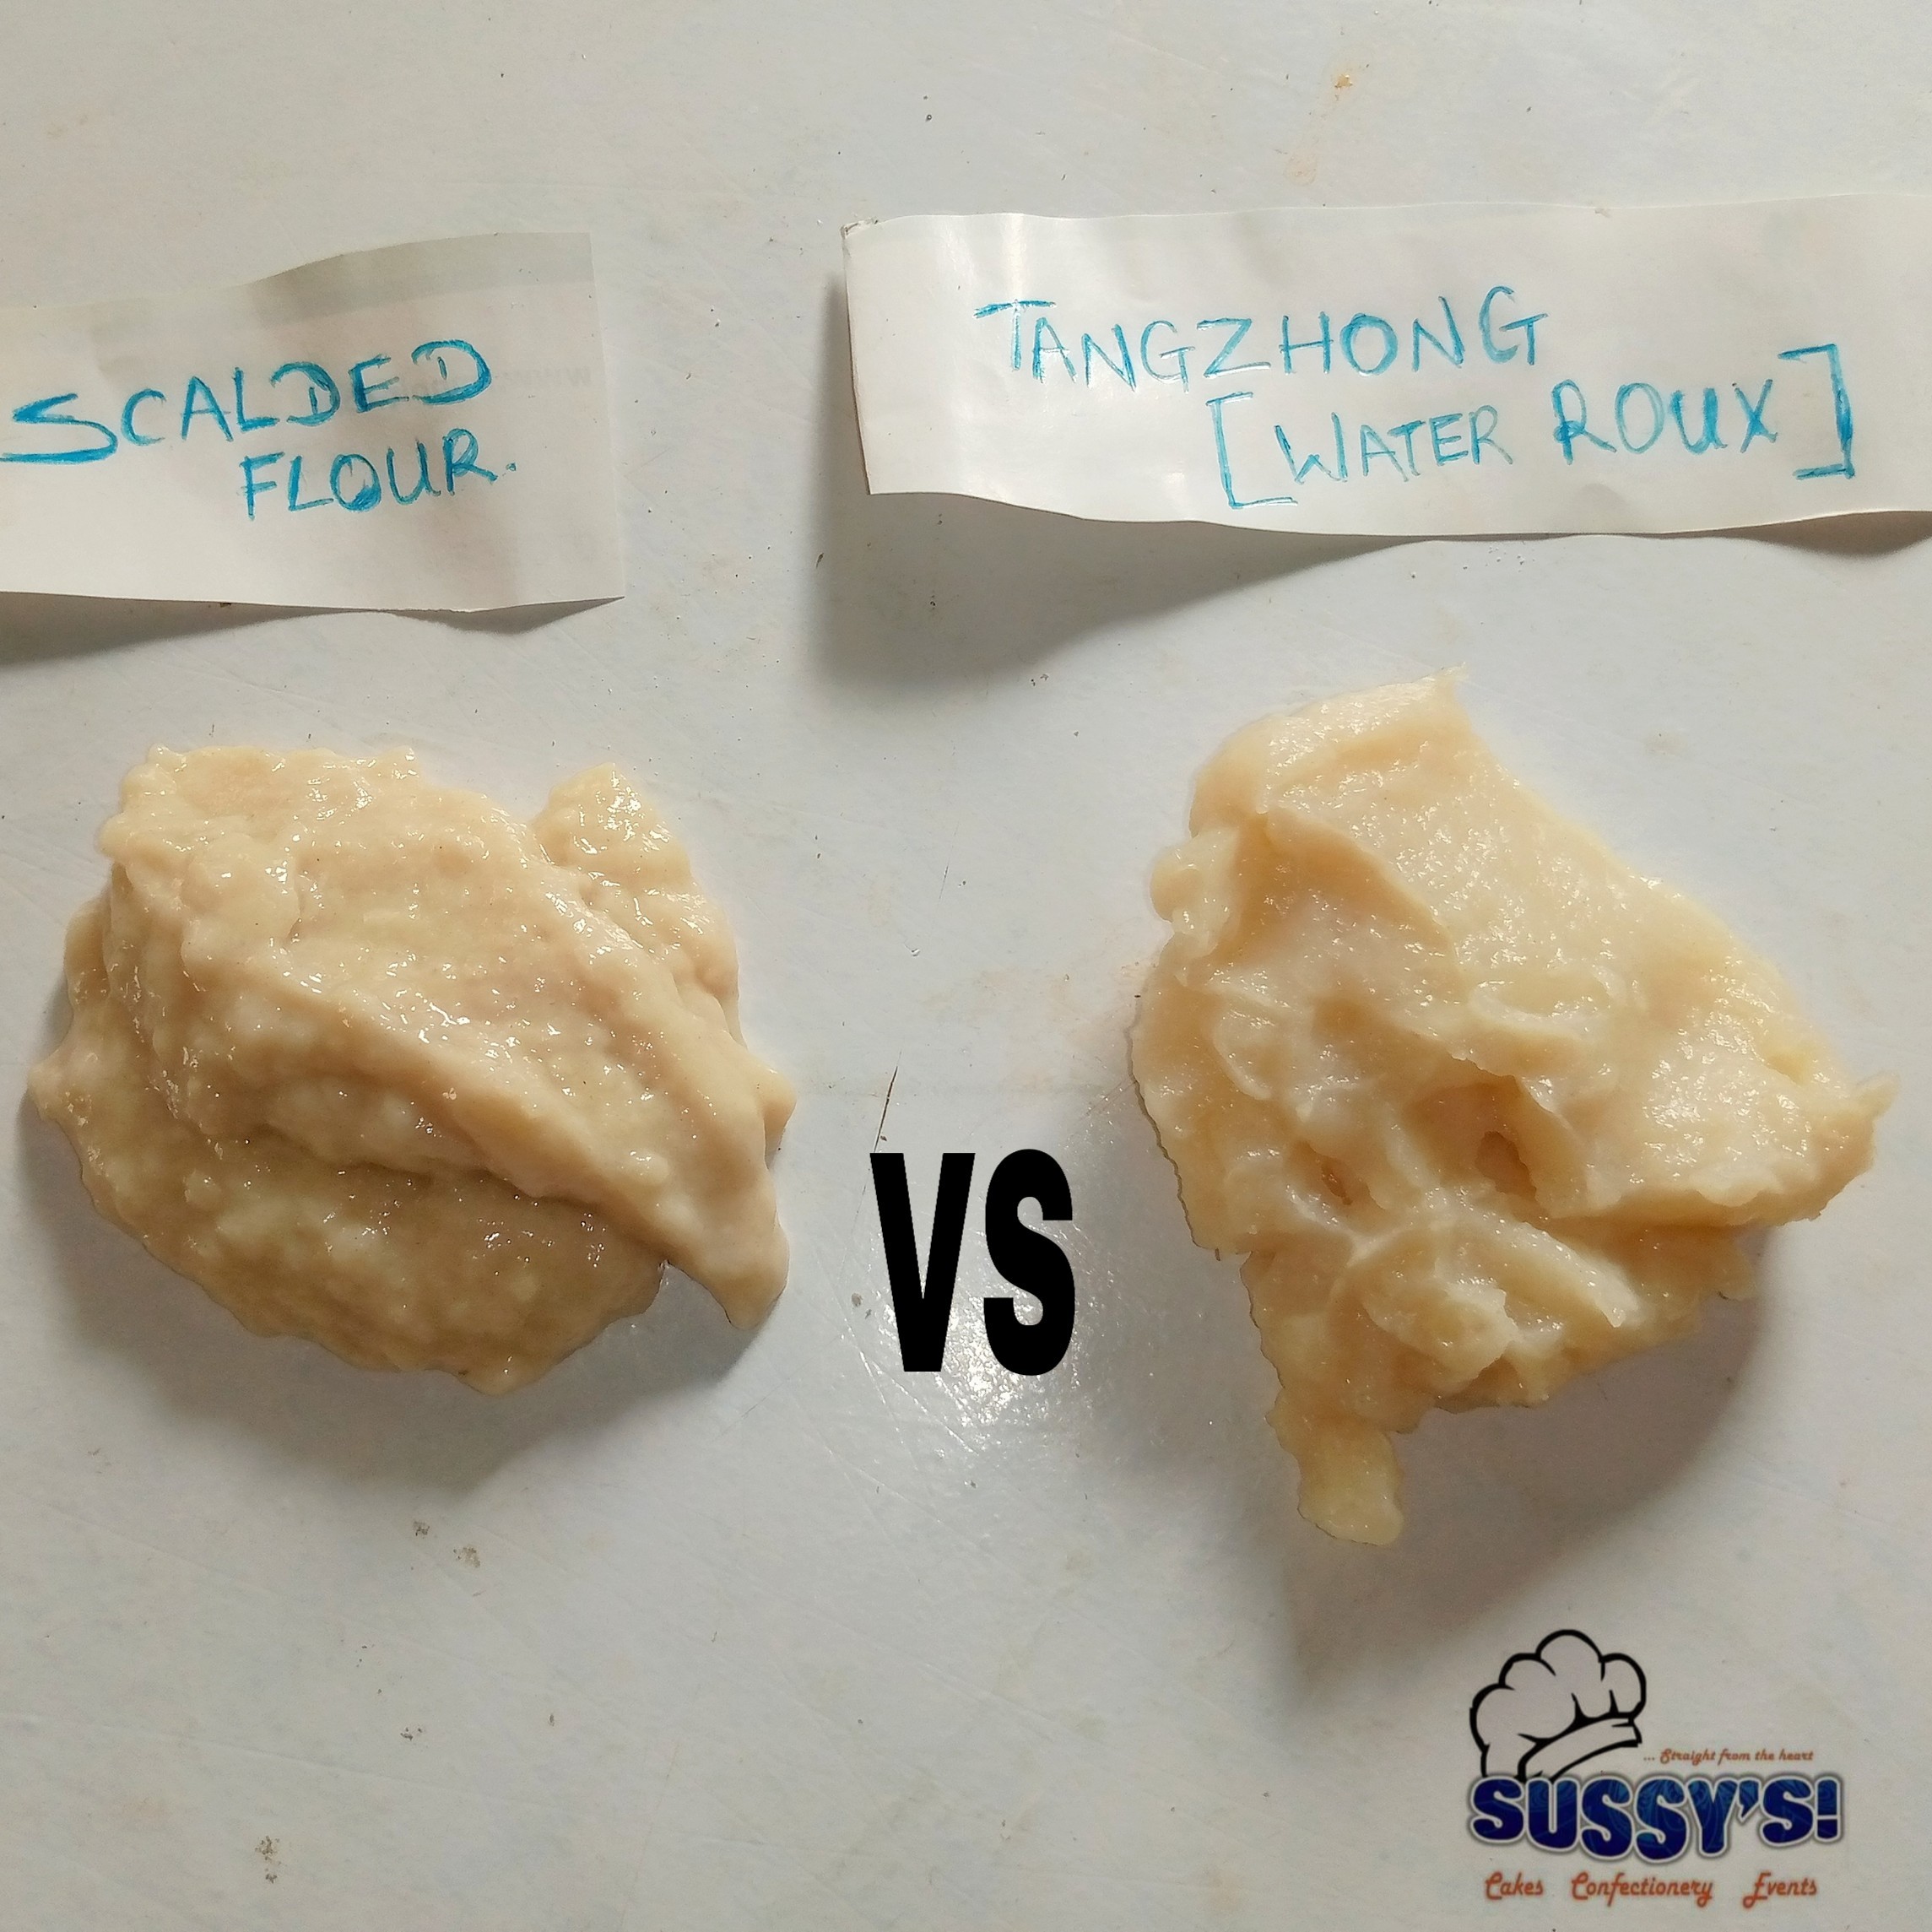
After an autolyse of just a few minutes, the gluten is very well formed and is ready to stretch with the expansion of yeast bubbles. Salt and yeast are added after the autolyse period is completed. It is quite different from scalded flour in the sense that it uses “warm” water, while scalded flour uses “hot or boiling water”.
Prof. Raymond Calvel, a French scientist and bread expert developed this technique in 1974, in response to what he saw as a deterioration in French bread production.
What to note when using Autolyse:
- When mixing the autolyse be sure that all the flour is fully moistened; dry flour won’t incorporate well later in the process.
- Don’t use an autolyse with sourdough rye bread. Because rye flour doesn’t develop gluten the way wheat flour does, and also ferments more quickly.
- To add instant yeast and/or a stiff sourdough starter after the autolyse is complete, dissolve them in a small amount of water reserved from the autolyse. Mix gently until the ingredients are fully incorporated before beginning to knead.
NOTE: I personally don’t use Dough Autolyse because it has some restrictions, rules, etc. I prefer scalded flour and water roux or just vinegar.
Scalded flour:
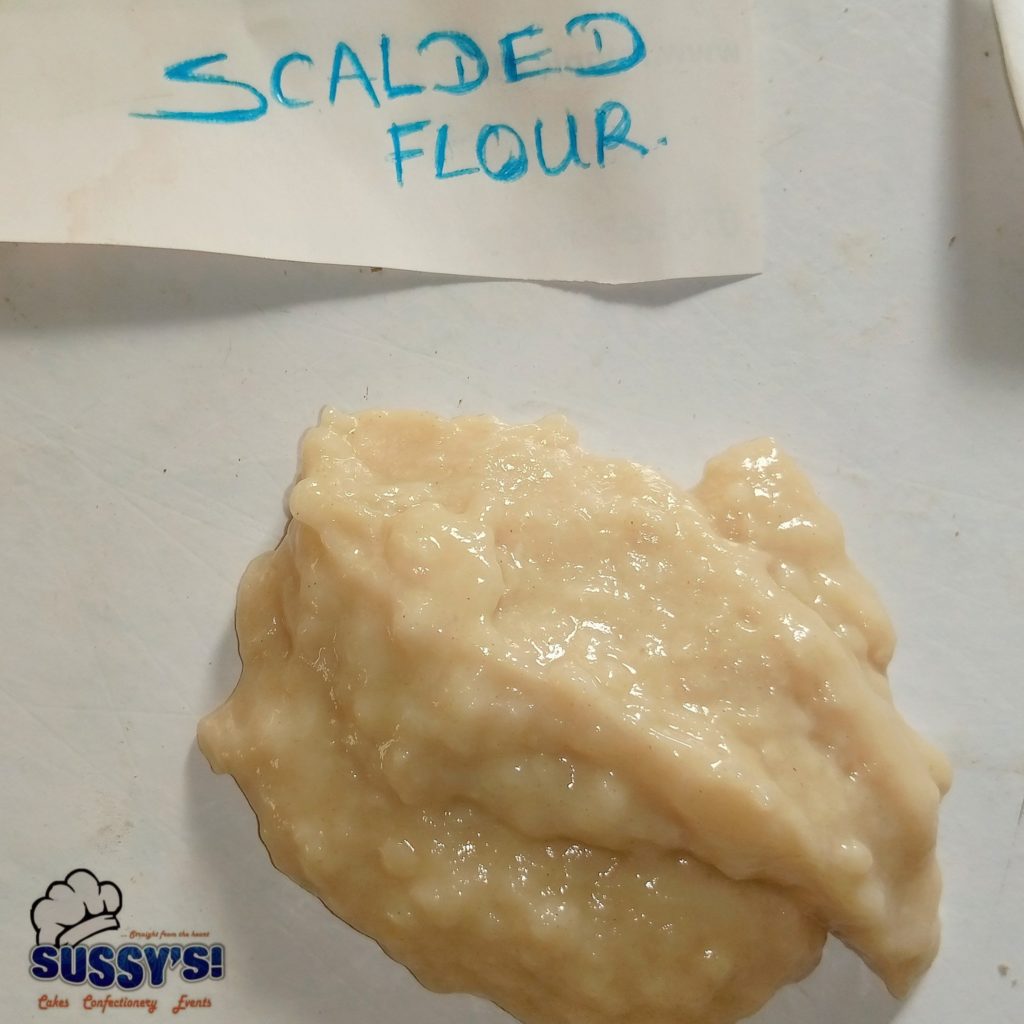
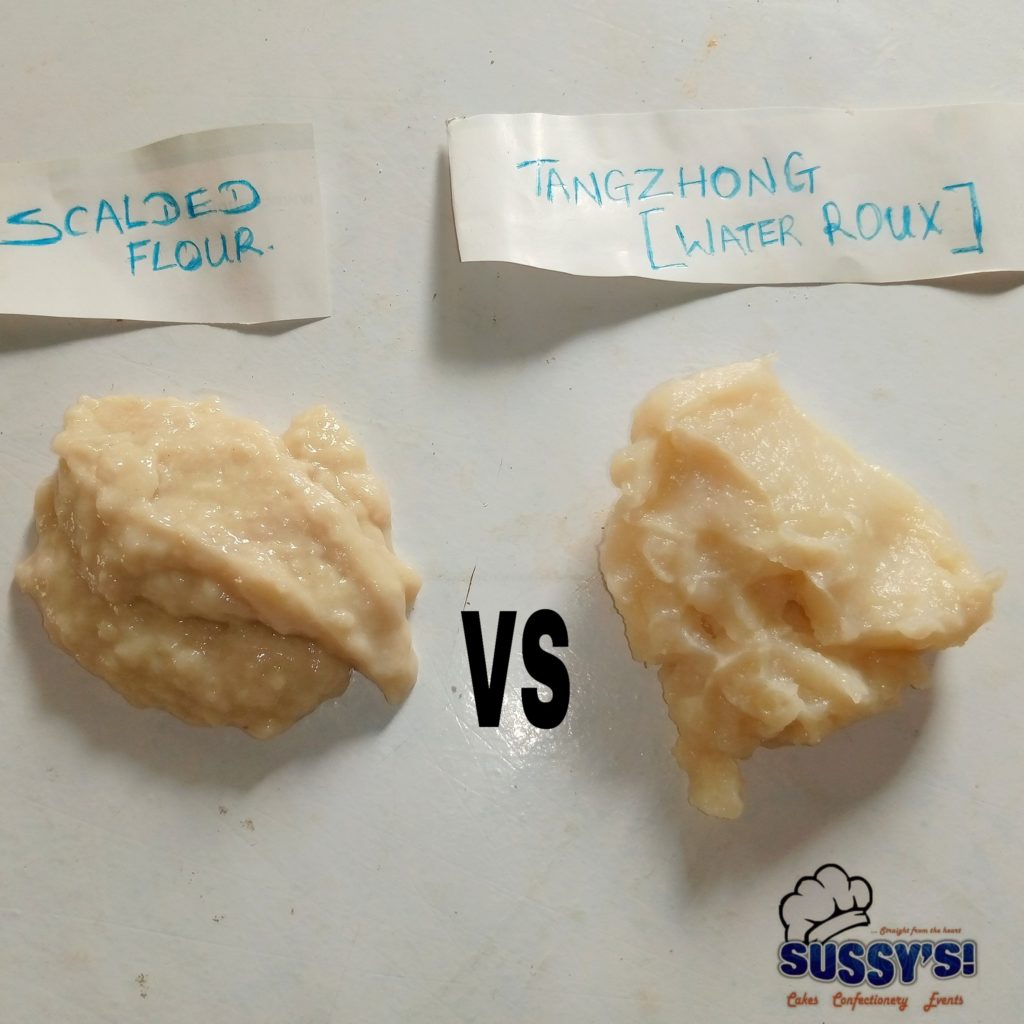
The scalded flour method was developed in Scandinavian countries for bread with rye flours.
The scalding of flour simply involves taking aside a portion of the flour in a bread recipe and stirring very hot water into it. The flour starch is gelatinized (that is, it is made soluble, and in this form as a carbohydrate it becomes readily accessible to the yeast) in the process, and adding the gelatinized starch to the dough imparts different and special qualities to the fermenting dough and the finished bread.
By scalding the flour with boiling water, you are sort of supercharging the flour and that’s what makes for a super soft texture even without butter, eggs or milk.
How does Scalded flour works?
If my bread recipe for instance calls for 500g of flour; and 300ml of water, I would normally remove 100g of flour from the total weight of flour stated in my recipe and set aside. Then for my water, I would boil regular clean water, and measure out 200ml and use to scald my flour. Then when I am mixing my bread, instead of using 300ml of water as stated in the recipe, I would use only 200ml (and this is because I already measured 200ml of water to use for scalding).
This also means you’re not re-introducing another flour or water in your recipe, you’re subtracting from the original measurements of flour and water in the recipe. Another thing worthy of note is, when preparing the hot water, make sure you boil excess, so you can measure from it. What I mean is don’t measure 200ml of water and boil to use (at the end of boiling, the measurement would reduce). It is adviceable to measure at least 500ml, boil, then measure-out 200ml from it.
How to make SCALDED FLOUR
Depending on your flour and water weight in your recipe, if boil water, measure out 100ml from the water set aside.
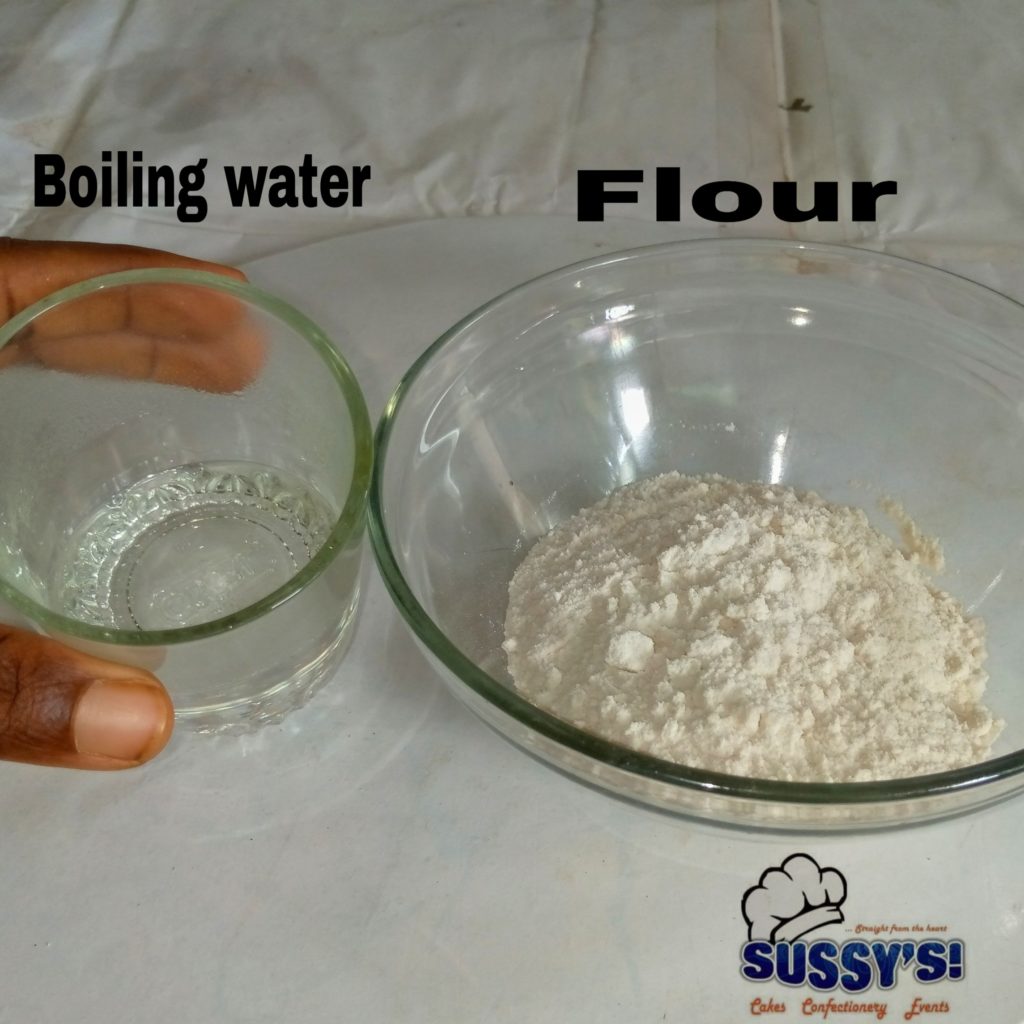
Scalded Flour Ingredients
Next measure out 100g from the total weight of your flour in your recipe, and pour in a bowl, then add your 200ml of boiling water, stir well to combine using a hand whisk to eliminate lumps.
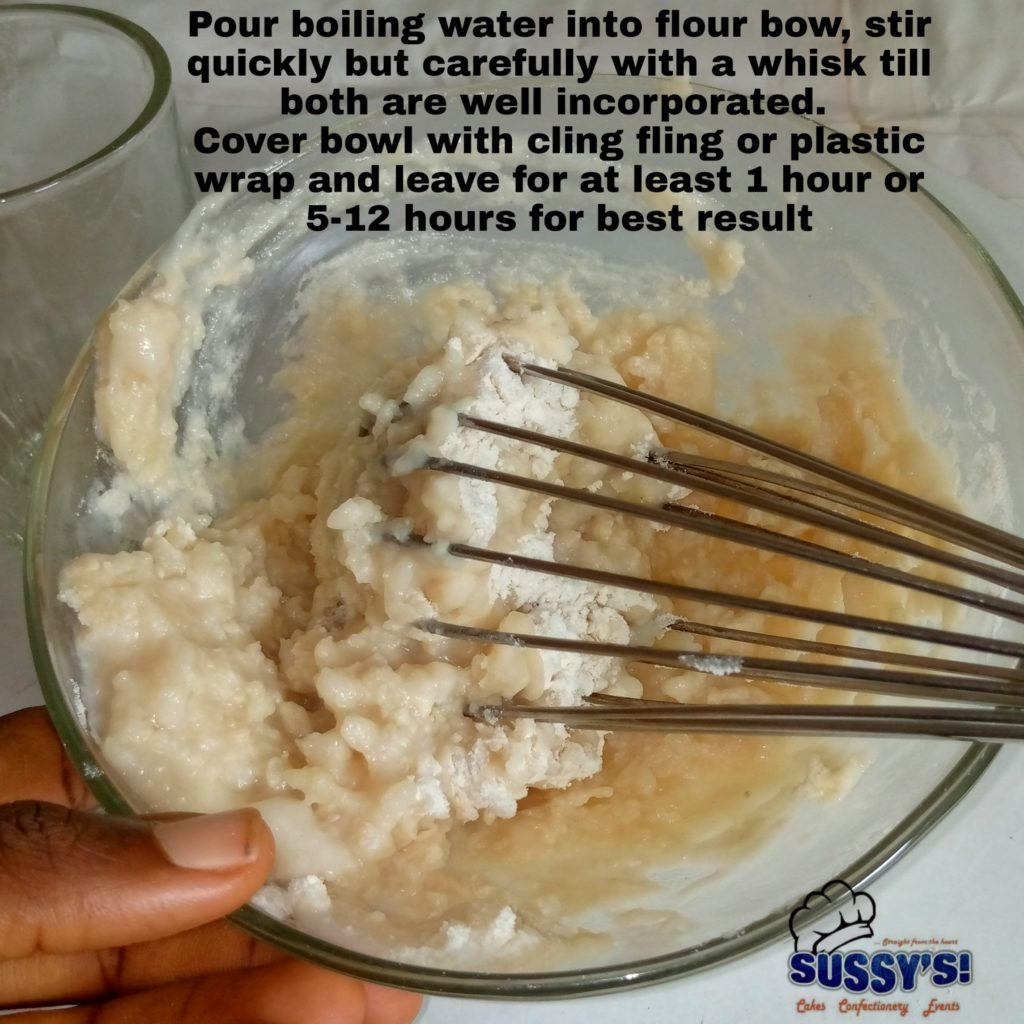
Then cover bowl with a cling fling or plastic wrap and allow scalded flour rest for at least 1 hour before using. For best results, leave it for 5-12 hours.
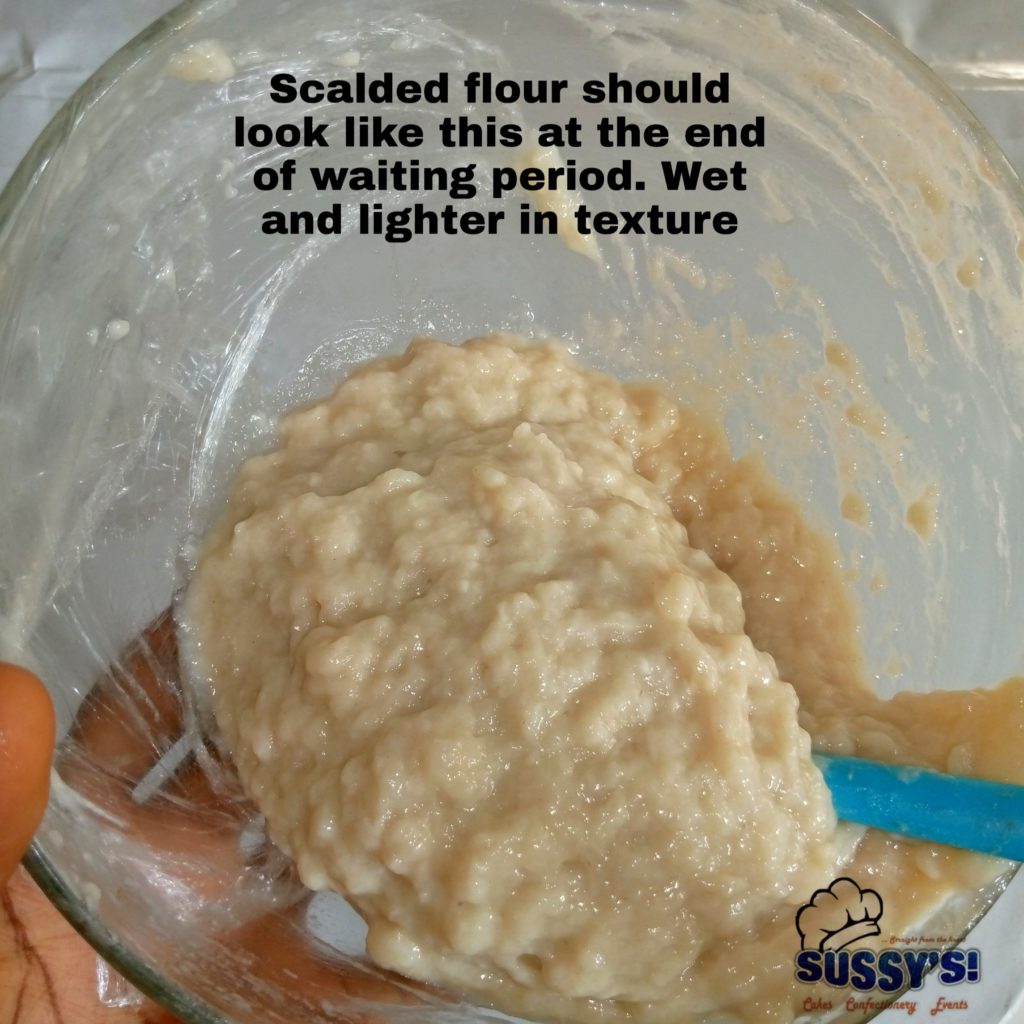
To use, simply add it to your mixing bowl when adding your wet items. Also remember to subtract 100ml of water from your total water measurements in your recipe as you already used that to prepare scalded flour. Then continue with your bread recipe.
- A precise method of measuring water and flour for scalded flour is using a 20%-25% rule
- What this simply means is get the 20% or 25% of your total weight of flour, measure-out from and set aside. Then double the percentage for boiling water.
- In a clearer terms, if your flour measurements is 500g and you decide your scalded flour percentage should be 25%; then get the 25% of 500g which is 125g. Then measure out 125g from your Flour measurement that you already set aside for bread.
- Now for the water, double the percentage you got from flour; which would be 250ml. So your the measurements of your boiled water 250ml.
Tangzhong (Water roux) :
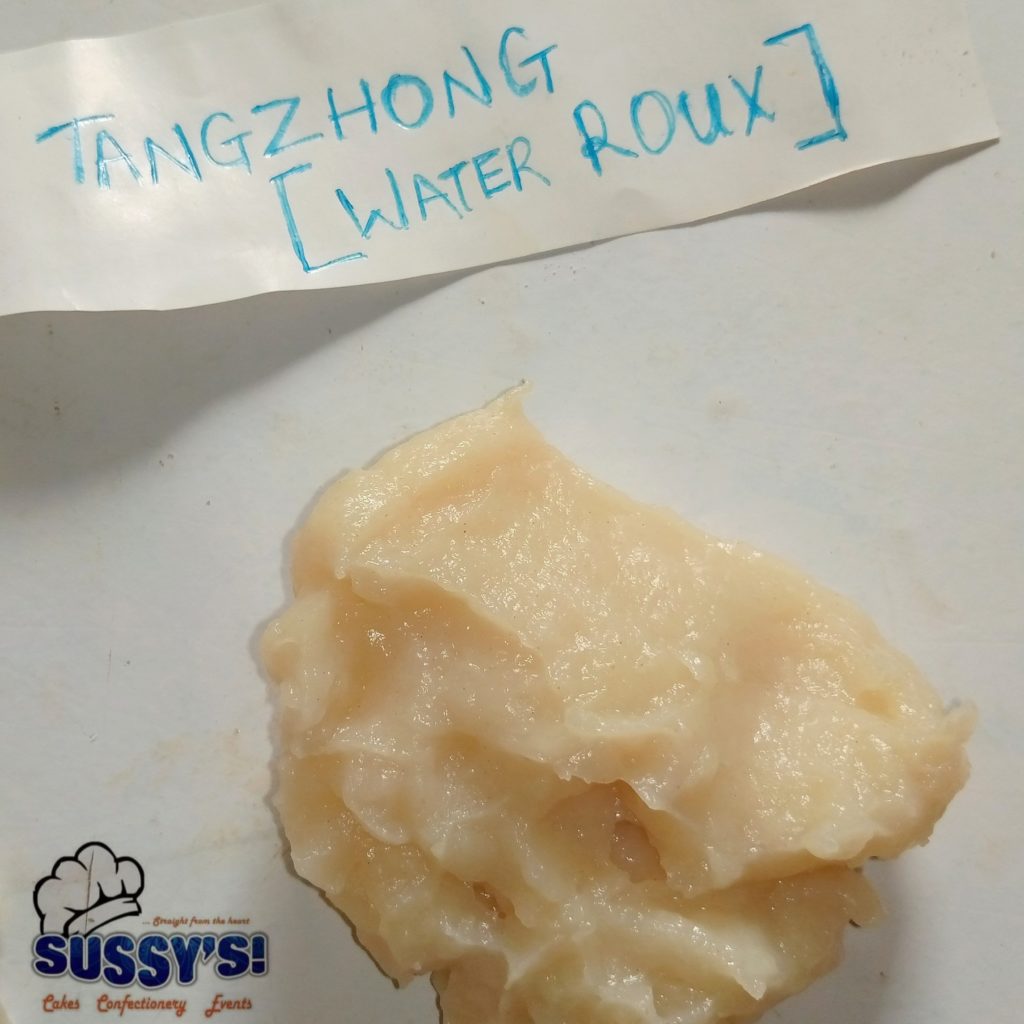
Tangzhong (Water Roux)
This dough conditioner is peculiar to the Japanese and was popularized in Asian countries by a Chinese cookbook author Yvonne Chen in a book called the 65°C Bread Doctor. In my SOFTEST and FLUFFIEST CHINESE SAUSAGE BREAD, I made use of this Water roux. It is a starter used to achieve a soft, and stretchy dough. It is also a natural preservative that can keep your bread fresh for up to 4 days!
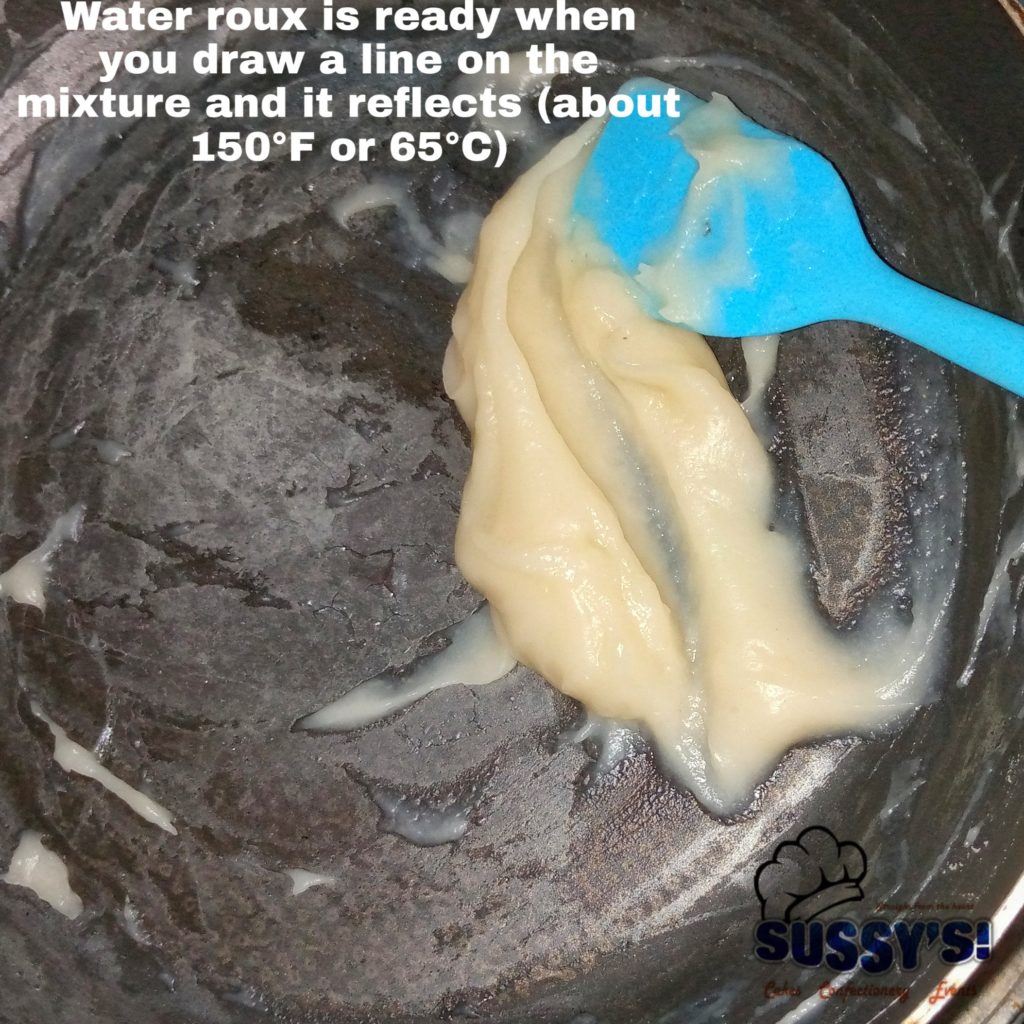
The correct measurement for Tangzhong, or water roux, “is a mixture of 1 part flour to 5 parts water, by weight,” that you stir and cook until the starches in the flour gelatinize and the mixture thickens. This magically happens at 150°F, or 65°C if using a thermometer. I will share with you how I do mine without a thermometer.
Now, Tangzhong is made up of both flour and water, it “is added in place of a portion of the flour and water in your formula, not in addition to“. What this simply means is that you are not adding an extra flour or water to your recipe. It is from the measurements of your flour and water in your recipe that you take from to make your water roux.
The amount of flour you use in the Tangzhong can vary from 5%-12% of the total amount of flour. I usually do 10% (what I mean here is the total percentage of Water roux you want to use in your recipe). Don’t go beyond 12%. Once you’ve settled on the amount of flour, simply multiply the weight of the flour by five, and that’s the amount of water you’ll need. Quite simple right?
Let’s break these theories or mathematical expression down a little. Let’s say in your bread recipe, the weight of flour is 300g; water (liquid) is 200g and like me, you decide to do 10% of Tangzhong. This simply means you will first get the 10% of 300 (measurement of flour) which is 30. That means you are going to remove 30g from your 300g of flour and set aside for your water roux.
Now for the water part, remember I mentioned earlier that the correct measurement for water roux is a mixture of 1 part flour to 5 parts water, by weight. Right? So you will now multiply the 30g you got from flour by 5 (which is in the formula of water – 5 parts of water). This will give you 150g. From your water (liquid item) measurement, you will weigh-out 150g.
Hence for the water roux measurements for would be 30g of Flour, and 150g of water. Very simple.
How does Tangzhong work?
Bread is moist largely because of water content. The more water, the moister the bread. The longer the water stays in the bread, the longer the bread stays moist. When you cook water and flour together until the starch granules swell up, what you’re basically doing is forming a gel in which the starches bind or hold onto the water far longer than in a standard dough. You’re also inhibiting some of the gluten from forming, creating a more tender product.
How to make TANGZHONG (WATER ROUX) :
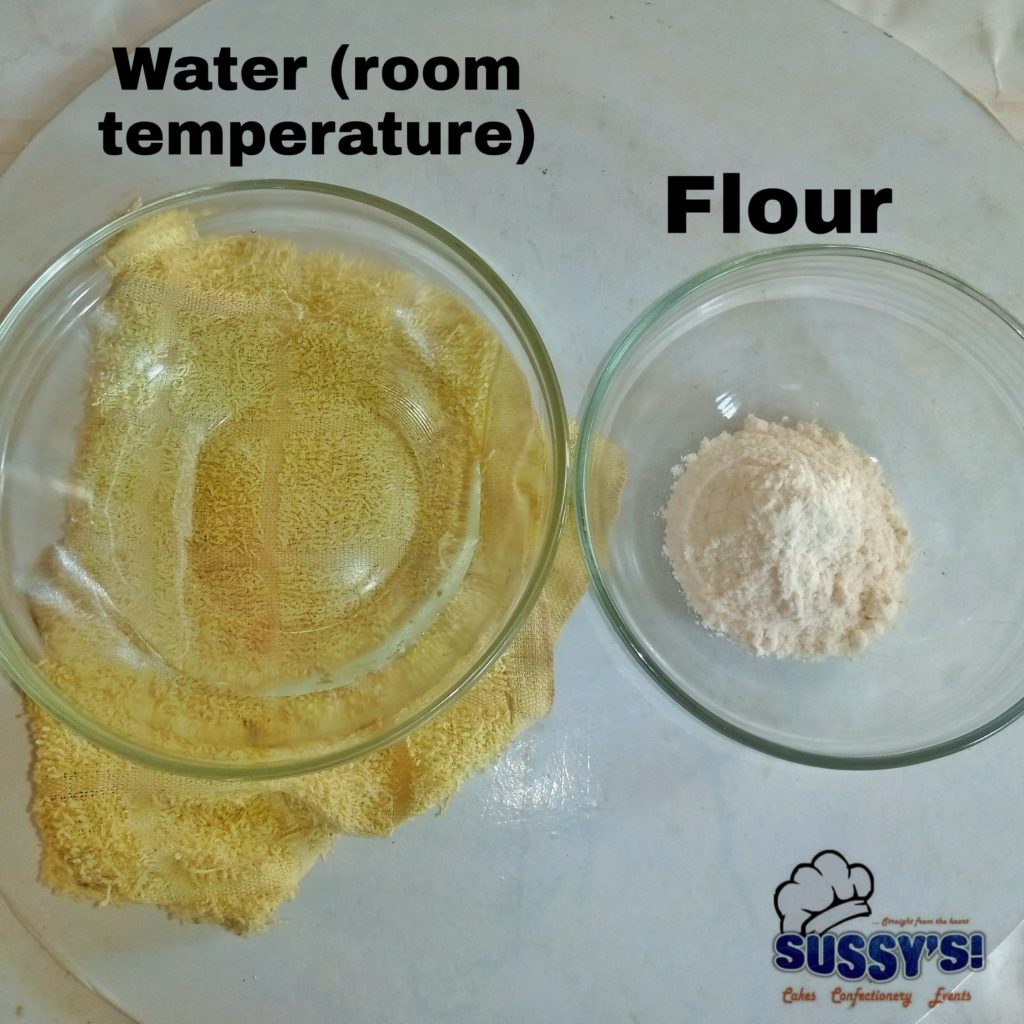
Using the ” 1 part flour to 5 parts water, by weight” rule, in a medium sauce pan add your water and flour, stir well to combine.
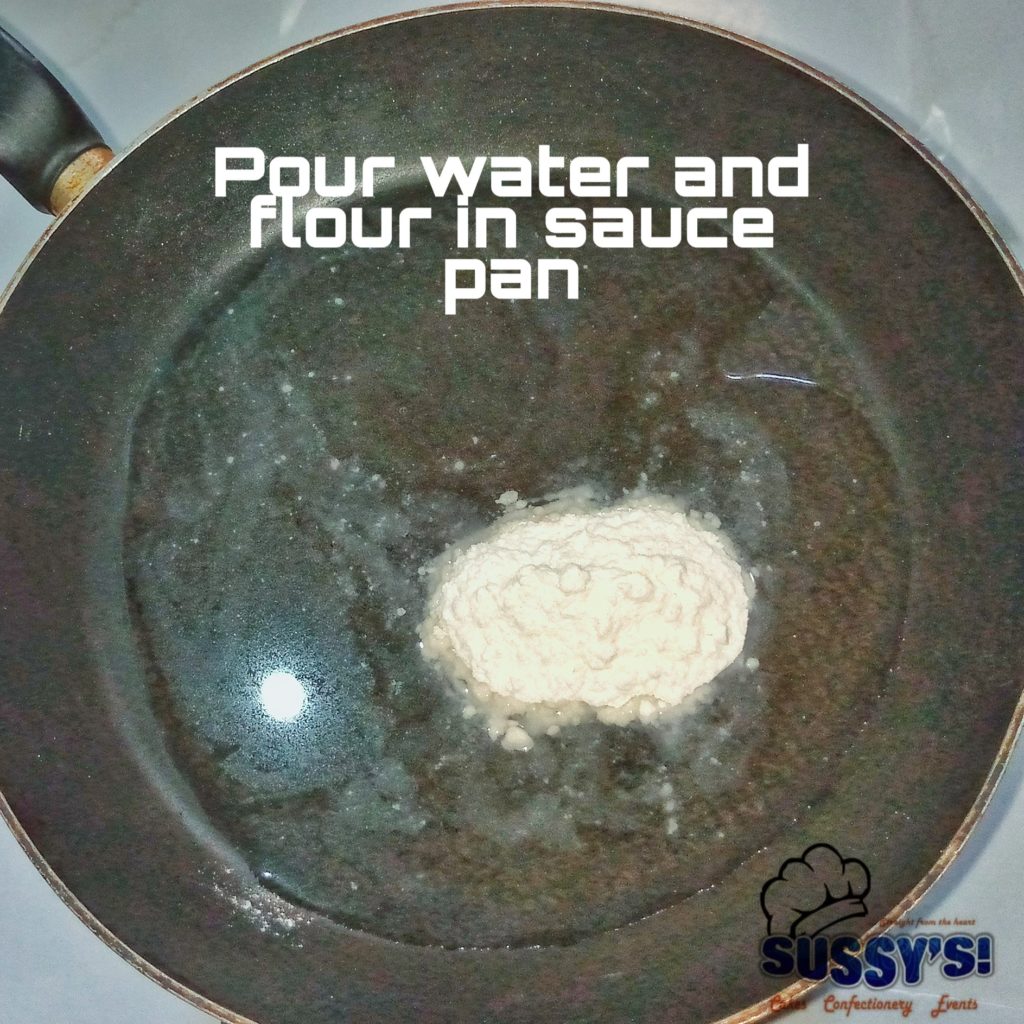
Set saucepan over low heat, and cook mixture, stirring continuously. Mixture will start creating bubbles. Keep stirring to prevent it form burning.
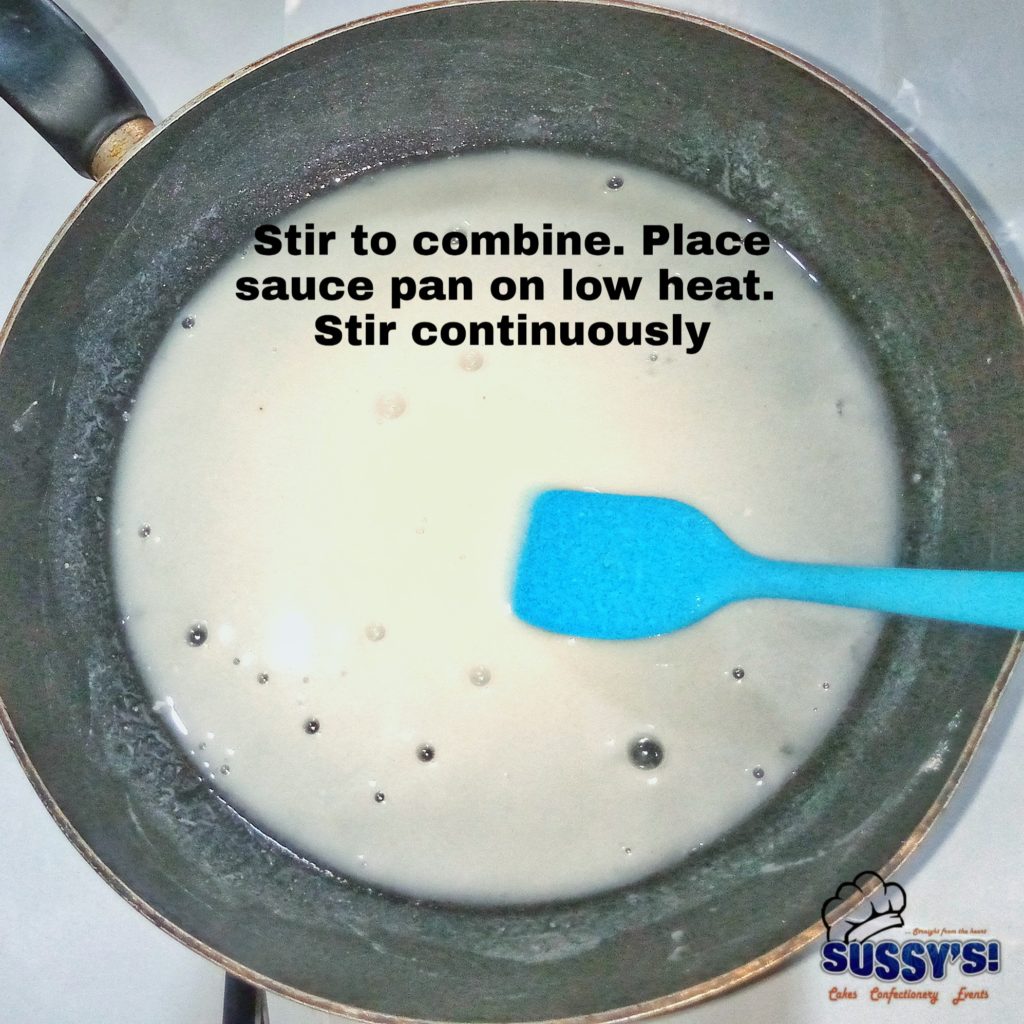
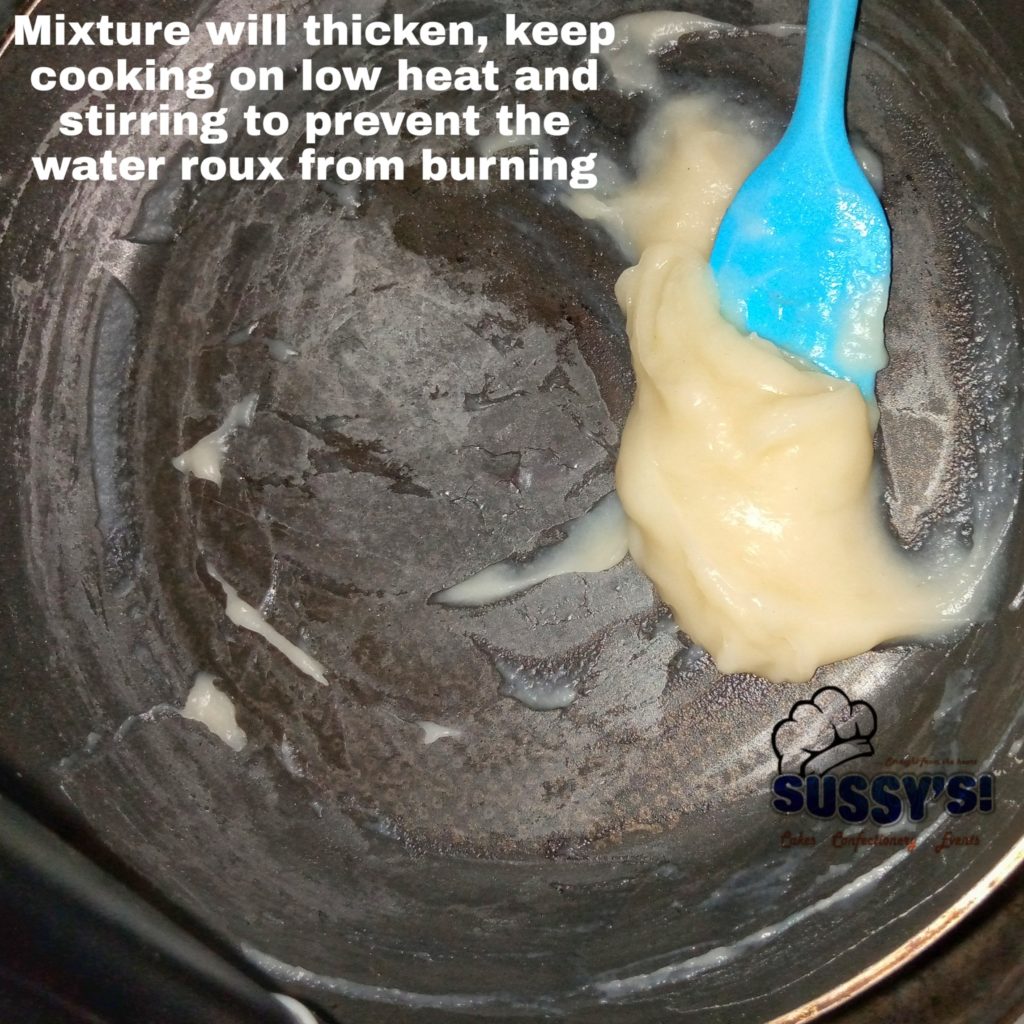
Once bubbles stops, and your spatula can create a visible line in the mixture, then your water roux is ready. This would be at 150°F, or 65°C if using a thermometer.
OTHER NATURAL DOUGH CONDITIONERS
- Sugar: Yes sugar. Sugar acts as a natural preservative in your baked item.
- Apple Cider Vinegar or Distilled White Vinegar : To use, use same measurement like yeast in your recipe. That is if the measurement of yeast in your recipe is 20g, you are using 20ml of Vinegar. I usually use this for my Donuts.
- Ginger : I once shared this on my PERSONAL FACEBOOK PAGE that Ginger is a good natural dough enhancer. I was surprised that most people didn’t know. Adding ¼ tsp of powdered ginger per bread loaf works magic! And no your bread won’t taste like ginger!
- Dry Milk Powder: Dry milk powder will help your bread rise higher, stay soft, and hold the moisture longer. That means it won’t get stale quickly. Dry milk powder creates a more golden brown crust and improves nutrition. Use 2 tablespoon of instant dry milk powder per bread loaf. I would stop here and elaborate more in my next article about Natural Dough Conditioners.
What are the benefits of a Dough Conditioner?
- Dough conditioner helps to reduce the rising and proofing process to save time and effort in the bread-making process.
- Makes the dough easier to manage and more tolerant to handle.
- Dough improver / conditional improves the environment and nutrients in the dough to promote yeast growth.
- Increases the gas production of yeast and gas retention by the gluten.
- It provides more consistent results.
- It compensates for flour quality variations and external variables. This usually occurs when you use a different flour type apart from what’s stated in your recipe.
- It strengthens the gluten structure to create a better crumb texture and chewy texture.
- Increases the volume of the bread without extra proofing time.
- It improves the crust development and color of your bread.
- Increases the overall bread yields from the dough batch; keeps the bread fresh for longer; and delays the staling of the bread.
SECRETS YOU NEVER KNEW ABOUT DOUGH CONDITIONERS | Commercial VS Natural Dough Conditioner
Equipment
- 1 Mixing Bowl
- 1 Hand whisk
- 1 Stove / Cooking Gas g
- 1 Saucepan
Ingredients
Scalded Flour
- 100 grams Flour
- 200 ml boiling Water a
Tangzhong (Water Roux )
- 1 part Four Flour Flour r
- 5 parts Water room temperature
Instructions
Scalded Flour
- Measure out about 500ml of water and boil .Once boiled ,measure out 200ml of the boiling water and set aside .
- Next measure out 100g of flour and pour into your boiled water
- Stir quickly but carefully till flour and water are well incorporated using a hand whisk .
- Change to a spatula , mix well well. .
- Cover bowl with plastic wrap or cling film and allow scalded flour rest for 1 hour in a cool dry place or 5-12 hours for best results
- A more precise method for scalded flour that's is pperfect for any flour and water weight is is using a 20%-25% rule . What this simply means is get the 20% or 25% of your total weight of flour, measure-out from and set aside. Then double the percentage of your flour measurements for boiling water. In a clearer terms, if your flour measurements is 500g and you decide your scalded flour percentage should be 25%; then get the 25% of 500g which is 125g. Then measure out 125g from your Flour measurement that you already set aside for bread. Now for the water, you multiply 125 by 2 (25% measurement gotten from your total weight of 500g of flour) which would be 250ml. So your the measurements of your boiling water would be 250ml.
Tangzhong (water roux )
- Using thethe " 1 part flour to 5 parts water, by weight" rule, in a medium sauce pan add your water and flour, stir well to combine. (SeSeer the note notes )
- Set saucepan over low heat, and cook mixture, stirring continuously. Mixture will start creating bubbles. Keep stirring to prevent it form burning.
- Once bubbles stops, and your spatula can create a visible line in the mixture, then your water roux is ready. This would be at 150°F, or 65°C if using a thermometer.
Video
If you liked this recipe, kindly leave me a reaction. This will encourage me to create more no-fail homemade simple recipes! Also use the share button to share the recipe. Thank you.
To sign up for my CLASSES either online that runs 24/7 or on-site please send me a direct message via email or through any of my social media platform.
sussan apeh
Remember to always tag us to your creation using #sussycakesrecipes
I love to see your feedback and creation!
Nutrition Facts
Serving Size1
- Amount Per ServingCalories364
- % Daily Value *
- Total Fat
1g
2%
- Saturated Fat 0.2g 1%
- Cholesterol 0mg 0%
- Sodium 8mg 1%
- Potassium 109mg 3%
- Total Carbohydrate
76.3g
28%
- Dietary Fiber 2.7g 10%
- Total Sugars 0.3g
- Protein 10.3g 21%
- Calcium 21mg 2%
- Iron 5mg 28%
* The % Daily Value tells you how much a nutrient in a serving of food contributes to a daily diet. 2,000 calories a day is used for general nutrition advice.

Sussan Apeh weldone have gone through it.i will b talking about the roux since that’s what you use as well from Ur write up.
But before that I saw where u stated vinegar as a natural dough conditioner too.will it suffice without using d roux
Secondly the roux after making it ,will It get cold before adding to the remaining mixture? Thanks
I use water roux, scalded flour, or vinegar. You can only use one not all at the same time. Just one. They all perform the same role.
Then your water roux need to cool completely before using. I hope this answers your questions?
Thank you.will try it out soonest
Looking forward to your feedback and feel free to tag me using #sussycakesrecipes
Thank u so mch for this
My pleasure anytime